Tuesday, October 30, 2012

GEODE DRESSER KNOBS


I have been so excited to show off these rockssss I found at an estate sale on a farm!  And the best part? I got ten of them for $15! My sister also scored some awesome 30's camera equipment to use as decor, they just had the most amazing stuff! These rocks were in a huge box with tons of different rocks and I noticed a few of them had screws and thought they would make awesome dresser knobs! 
I picked up some more screws and washers from Ace Hardware for the rocks that didn't have them, and used some sealer I found in my basement and hot glue to attach the screws. Ideally if you had some sort of rock drill this would be best, to drill a hole in and fill with glue so that they stay put better. The ones that came with screws on them already were attached with some sort of glue and were still holding up really well. It is pretty self explanatory from here.
You can pretty much make anything into dresser knobs when you think about it!

-Jerica-

Sunday, October 28, 2012

DIY JELLYFISH COSTUME


This is a super easy costume I threw together before a Halloween bar crawl last night. I got the idea from a Martha Stewart blog on DIY costumes. 

MATERIALS
Scissors 
Clear Bubble Umbrella - I got mine from Walmart
Cellophane
Hot glue gun
White paint
 The instructions called for small and large bubble wrap but I went with one roll of large bubble wrap. I cut 8 large strips in a wavy pattern for the tentacles and the same with the cellophane. I hot glued one bubble wrap strip and one cellophane strip together on each panel. I then cut a bunch of smaller strips of both materials and glued them to the metal bars inside the umbrella. I paired it with a sheer white dress ( I got a blue one also; any shear color looks good with it!), some white tights and ballet flats. Other ideas could be a long shear Maxi dress or a hi-low skirt. But since its October those are hard to find last minute!
-Amy-

Thursday, October 25, 2012

WARM HONEY LAVENDER MILK


So as Facebook and Instagram have well informed me today - Colorado had its first snow of the year! The frost 3 weeks ago doesn't count. So last night I got the pleasure of being in my car for over an hour because of snow + traffic . Andddddd being late to work because of 2 car accidents! Even though no snow stuck :(. but after a stressful week I'm taking it easy tonight with some sweet and soothing warm milk with added honey and lavender buds! I added in about 2 tablespoons of honey and 1 teaspoon of lavender buds. This is going to knock me out better than NyQuil tonight!
-Amy-

Wednesday, October 24, 2012

WHAT WE'RE LISTENING TO AND YOU SHOULD YOU!


The Gallows by Cocorosie
Just in time for Halloween
And my sister and me having some cemetery fun. There was a Victorian burial reenactment in Boulder, with mourners ribbons and everything. Vintage hurses (hursi?) and local ghost stories til sunset.
-Jerica-

Tuesday, October 23, 2012

OLIVE GARDEN COPY CAT: CHICKEN GNOCCHI SOUP

I have done an olive garden copy cat recipe before, for their Zuppa Toscana soup, and it turned out so delicious. That one is made in the crockpot, and the main ingredients are Italian sausage, potatoes and kale. Amazing. However I must say that this Chicken Gnocchi recipe does not taste exactly like Olive Garden's (I don't think theirs has onions or thyme) but that doesn't mean it isn't great! This is a lot more creamy and filling than their Zuppa Toscana but I still don't know which is my favorite!


I tackled making some of my own gnocchi, which turned out to be super easy. All you need are potatoes, flour, and an egg. That's it! There is a nice little tutorial here, but basically all you do is bake a few potatoes for 45 minutes, remove the skin as soon as they come out, and grate it up with a very fine cheese grater. Then you add you egg and flour and mix it up! You cook them by rolling them up and placing them in a pot of boiling water, and when they  float to the top they are finished cooking.
Pair it up with some homemade garlic bread and you're good to go. Mmmmmmm carbssssss.

GNOCCHI

Serves 4
INGREDIENTS:

  • 2 potatoes, peeled
  • 2¼ cups plain flour
  • 1 egg  

FOR THE SOUP
INGREDIENTS:
  • 1 cup chicken breasts, diced and cooked (can use canned chicken or turkey)
  • 4 Tbsp butter
  • 4 Tbsp olive oil
  • 1 quart half and half (can use evaporated milk)
  • 1 14 ounce can chicken broth
  • 1/2 cup celery, sliced
  • 1/4 cup flour
  • 2 garlic cloves, minced
  • 1 cup carrots, shredded
  • 1 medium onion, diced
  • 1 cup fresh spinach, coarsely chopped
  • 1/2 tsp dried thyme
  • salt and pepper to taste
  • 16 ounce package gnocchi (or make your own!)

PREPARATION:

1.In a large stockpot, saute the onion, celery and garlic in the butter and olive oil. When the onion is clear, add the flour and form a roux. Stir and cook a minute. Add the half and half.

2. In another pan, cook the gnocchi according to the instructions above.

3.Add the carrots and chicken to the stockpot. Stir often and when it gets thicker, add the chicken broth, gnocchi, spinach and seasonings. Cover and heat through. Enjoy!

Recipe from PassTheSushi

-Jerica-


Monday, October 22, 2012

TRIANGLE ART WITH PAINT SAMPLES


Another craft with a thrift store frame and paint samples! I used the card stock that was already in the back of the frame, painted it white, and used a little mod podge to glue all the triangles on. The triangles are cut from paint samples, as well as Anthropology and Urban Outfitters catalogs. Seeing as everything is too expensive for me might as well put those catalogs to good use!
-Jerica-

Sunday, October 21, 2012

DIY IPHONE CASE

I have a really bad habit of breaking my phones. I break my phone about every other month! Lucky for me my dad is a tech junkie/nerd and he can fix it himself- so I never have to pay to get it fixed or buy a new one! However knowing this has only encouraged me more to continue not using a case. Buttttttttttttttt since I got my wood burning pen I have been wanting a wooden iPhone case to customize my own case! Now my phone is nice and safe...for the time being however. 

I ordered this wooden case off of amazon for only 5 bucks + free shipping- the catch? it took about a month to get in. But its a simple project none the less- really doesn't require any step by step instructions. If you have the wood burning tool you understand it works on any wooden surface- let it heat up and draw to your heart's content. I didn't use any rulers or anything I wanted it to have the hand drawn vibe to it, so the lines are not even or straight. I am debating on putting a stain on it to make it a little more of a darker/worn wood. But that will be a different project for a different day. I'm going to use it how it is for a little and see if I like it as is. Now I need to brainstorm what I want to burn up next! I am thinking a wooden cutting board or maybe one of my cheese boards - I got a bunch from the thrift stores with domes for succulent terrariums but haven't gotten to that project yet...maybe I can kill two birds with one stone and make a terrarium with some wood burning accents. tune innnnnnnnn for that next time!

       -Amy-

Saturday, October 20, 2012

GHOST PARTY

I came up with the idea for this little guy all by myself! Got the frame from the thrift store and spray painted it with the same spray paint I used for the lamp. The bottom edge of the ghost is just how the edging already was on the lace so it worked out perfect. I laid down the lace down on the paint while it was still wet so it would stick. Knock yourself out!

-Jerica-

Wednesday, October 17, 2012

PUMPKIN CHOCOLATE CHIP COOKIES

Oh my goshhhh. As soon as I tasted these I knew this would be something I would be making regularly. It's such a quick and easy recipe too. These are super fluffy little cookies, almost like the top of a muffin, so not really like a cookie at all! They are also very orange, it's not just a weird picture :).
They taste just like fall; dead leaves, wind and Halloween! Exactly what I expect of all my recipes!


PUMPKIN CHOCOLATE CHIP COOKIES
                                Makes 2 dozen


  • 1 cup canned pumpkin
  •  1 cup white sugar
  •  1/2 cup vegetable or olive oil 
  • 1 egg
  •  2 cups all-purpose flour
  • 2 teaspoons baking powder
  • 2 teaspoons ground cinnamon
  • 1/2 teaspoon salt 
  • 1 teaspoon baking soda 
  • 1 tablespoon vanilla 
  • 2 cups semisweet chocolate chips

1. Combine pumpkin, sugar, vegetable oil, and egg. In a separate bowl, stir together flour, baking powder, baking soda, ground cinnamon, and salt.

2. Add flour mixture slowly to pumpkin mixture and mix as you go.

3. Stir in the vanilla, followed by the chocolate chips.

4. Spoon onto greased cookie sheet and bake at 350°F for approximately 12 minutes or until firm.

Original recipe found here

-Jerica-

Tuesday, October 16, 2012

LAMP REVAMP WITH SPRAYPAINT


I have been wanting to try this foreverrr and I finally took the plunge. Now it's time for you to take the plunge. Spray paint an old lamp, you will be so glad you did. I used a ceramic-type lamp that I got from the thift store but I imagine you could make this work for almost any type of material. If you are painting over a lamp that has a darker color, you will want to spray a layer of white primer first. You can find this in the spray paint section at any craft store!

The color I used from Krylon is a Satin finish called Catalina Mist. I meant to pick up a high-gloss finish which is what everyone recommends, but I got too excited about the color and forgot to even look at it! But luckily it turned out with a glossy finish still.
When spraying you'll want to be sure to stay about a foot away and build the color in layers. Do not get closer than this because the spray paint will pile up too fast and create drips like mine did a little bit :( But I still just love it!

DIRECTIONS
Spray the lamp.  

*The picture is a wood transfer I did a while back. Check back for a tutorial on that!

-Jerica-

Monday, October 15, 2012

BOOKCASE UPDO

Do you have a spare hour or two? Do you have an extra bookcase already made and sitting around in your garage waiting for you to do something with it? You do?! Then this is perfect for you, PERFECT! The house I live in was from the 30's and had been in the same family from then until I came around. It was in terrible condition and my dad and I pretty much remodeled the whole thing (okay mostly just my dad). I've been living here three years now, but needless to say, I still find lots of random things around. I found this bookcase buried in the garage and unfortunately was painted a not-so-flattering lime green. I whined to my babygurllll (boyfriend) to paint it for me, and he ended up painting it a cream color that I had lying around from when the walls were painted originally. So it blended in with whatever wall I put it against. I love the trend going around of painting the back wall of shelves, so I came up with this idea to help it pop!


I used painters tape to get the edges of these lines and did not do any measurements because I wanted to have a hand-drawn look (aka I'm lazy). I also changed up the color order in each section to make it look more sporadic. For the colors, I didn't want to have to get large amounts of paint for just a few lines, so I actually used fabric paints I had lying around and they worked perfectly! After lifting the tape there will probably be some bleeding, so just use a very fine brush to touch those spots up. Now I just need a sweet color coordinated book collection like everyone else haaaas!
Sorry the lighting isn't the best in these photos, I live in the basement of the house! 

-Jerica-

WHAT WE'RE LISTENING TO AND SO SHOULD YOU!


Videotapes by Blouse
-Jerica-

Sunday, October 14, 2012

HOME DECOR


I have been in the slow process of decorating my room. What has been in the way is the fact I need to clean my room first....but that will all happen in time! I am moving down to a basement room in my house that has these beautiful built in shelves that are perfect for my decanter collection. One of my favorite thrifting activities is to have a mission of finding something in particular- it makes me feel more productive rather than the feeling of me just going on a crazy shopping spree at the thrift store, (random great finds are still exciting though!). For a while in time my mission was decanters, decanters, and more decanters!  It all started with one lil guy- my first decanter that I found. Which I now use as my version of a brandy set, when in truth it holds my amaretto for my drink of choice, amaretto sours!!! The rest I am displaying on these lovely shelves- along with some other bottles and crafts!

  -Amy-

Wednesday, October 10, 2012

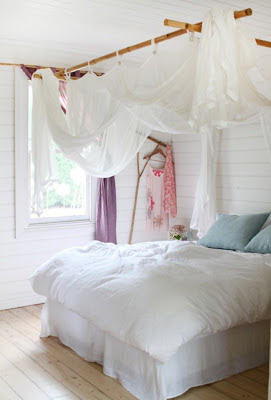
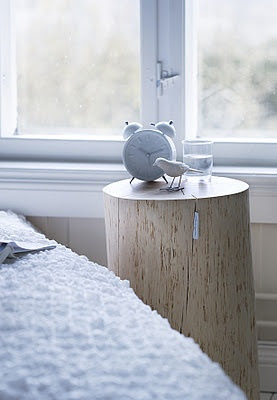
WHITE ON WHITE ON WHITE ON WHITE

I don't know about you, but I am OBSESSED with white spaces. Maybe not obsessed, but I do like em. They're just so clean, light, and airy and you can play around with the decor as much as you want, or keep all the decor white too! Here are some of my favorite white spaces from around something I like to call, the internet.


Sources from L to R
 1, 2, 3, & 4
-Jerica-

Tuesday, October 9, 2012

FALL via INSTAGRAM

Guysssssssssssss it's falllllll! The trees are changing colorsssssss. I think it's the perfect season for me to take another try at making a ginger spiced cake with cream cheese frosting! Check back soon- I got a brand new swanky awesome marketing and graphics job so my weeks no longer have time for cupcakes and playing with my pups :( I guess that's what weekends are for now!
-Amy-

Sunday, October 7, 2012

FALL DECORATION

Its finally feeling like falllll! We got our first snow this weekend here in Colorado, nothing stuck around but it was still exciting!  Unfortunately it seems to always be way too hot or way too cold and we miss spring and fall. Here's a little craft to help you hold on to the changing and falling leaves!


MATERIALS:
A Branch
Plastic fall leaves (I got mine from Hobby Lobby on a stem and plucked them off)
Hot Glue
Thread

It's pretty self explanatory from here, you simply tie a little knot around the stem of the leaves and tie another knot around the branch. For the other leaves that are directly on the branch, I dabbed hot glued the stem of the leaf and pressed them onto little nubs or slid them onto small twigs still on the branch. Mine also came with a little acorns so I put those on too! You could hang these guys on a wall, over your bed, or even tie it to yourself if you like it that much. You could also add feathers or whatever else you can think of!
-Jerica-

Tuesday, October 2, 2012

HONEY ALMOND & LAVENDER CUPCAKES WITH SALTED HONEY CREAM CHEESE FROSTING


Happy Belated Birthday to my dear dear friend and co-blogger, Jerica! Actually her birthday was a while ago but she had been in Hawaii- putting a hold on her birthday celebration. We booked a hotel down in Denver for a sweet hotel soireeeee, had dinner at Linger (a restaurant that used to be a Mortuary), and a night full of festivities at the bars!


   Here is an adorable picture from dinner of Kyle, Jerica, and Alix!

I initially wanted to make a cake and bring it to dinner- but that seemed like it’d end up being more work than needed. So I went with a Honey Almond and Lavender (gluten free!) cupcake with a salted honey cream cheese frosting. Sounds like a bit much but it is really a lightly sweet and floral cupcake!


Honey Almond Lavender Cupcake
PREP TIME: 30 MIN. TOTAL TIME:  1 HOUR
MAKES A DOZEN

FOR THE BATTER:
   ½        cup organic butter
    2        cage free eggs
 1¾        cup gluten free all purpose flour
 1½        teaspoon baking powder
    2        teaspoon dried lavender
   ½        teaspoon sea salt
    1        cup organic raw sugar
   ¼        cup organic honey
    1        teaspoon pure vanilla extract
    1        teaspoon pure almond extract
   ½        cup vanilla almond milk

FOR THE FROSTING:
    8        ounces soften organic cream cheese
    3        tablespoon soften organic butter
   ¼        cup organic honey
   ½        teaspoon pure vanilla extract
    3        cups organic powder sugar
    2        tablespoon lavender
    2        teaspoon of sea salt


1. Let butter and cream cheese sit at room temperature to soften up.

2. Preheat oven to 350°. Set up the cupcake wrappers into a muffin pan to maintain shape. Whisk together all the dry ingredients in a medium bowl and set aside.

3. Beat ½ cup of butter with an electric mixer. Add sugar,  ¼ cup of honey, 1 teaspoon almond and teaspoon vanilla extract. Beat  on medium speed and slowly add in eggs.
4. Slowly sift the dry mixture into the beater. Add in ½ cup of vanilla almond milk. Beat on medium speed until all is blended into a smooth and creamy consistency.  Add more almond milk if needed.

5. Spoon batter into cupcake holders about ¾ of the way full. Bake for 12 minutes and cool before frosting. Double check the cupcake is fully cooked by poking the middle with a tooth pick- if it comes out dry than its done! If not leave in for a few more minutes to cook.

6. Prepare the frosting while the cupcake cools. Let the 3 tablespoon of butter and 8 ounces of cream cheese soften at room temperature. Beat together softened butter and cream cheese on medium. Drizzle in the ¼ cup honey and  ½ teaspoon vanilla. Sift in the powder sugar slowly and beat until smooth and thick.

7. In a small bowl mix together 2 tablespoon of sea salt and 2 tablespoon of lavender evenly to create Lavender Salt for the topping.

8. Once cooled begin frosting the cupcakes using a pastry bag and frosting tip. Sprinkle each frosted cupcake with the Lavender Salt topping mixture and toasted almond slivers for texture. ENJOY