Showing posts with label christmas gift. Show all posts

Monday, November 25, 2013

PERFUME RECIPE


Lately I have been so into making perfumes and wanted to share a recipe every once in a while! My problem is that I don't keep track of how many drops, I just go crazy until it smells right. However, here is one that I did record recently. This would be an awesome customized homemade Christmas gift! After adding the oils, I dilute with pure ethanol (you can also use vodka!), the amount depending on if I want it to be a lighter or heavier scent, but your perfume should be mostly alcohol (~90-80%). I get most all my essential oils from Bulk Apothecary, their oils are really high quality yet so cheap! I should be getting reimbursed for this damn infomercial!


UPLIFTING SCENT
9 drops Green Tea fragrance oil
3 drops Pink Grapefruit essential oil
1 drop Bergamot essential oil
1 drop Lavender essential oil

-Jerica-


Wednesday, December 19, 2012

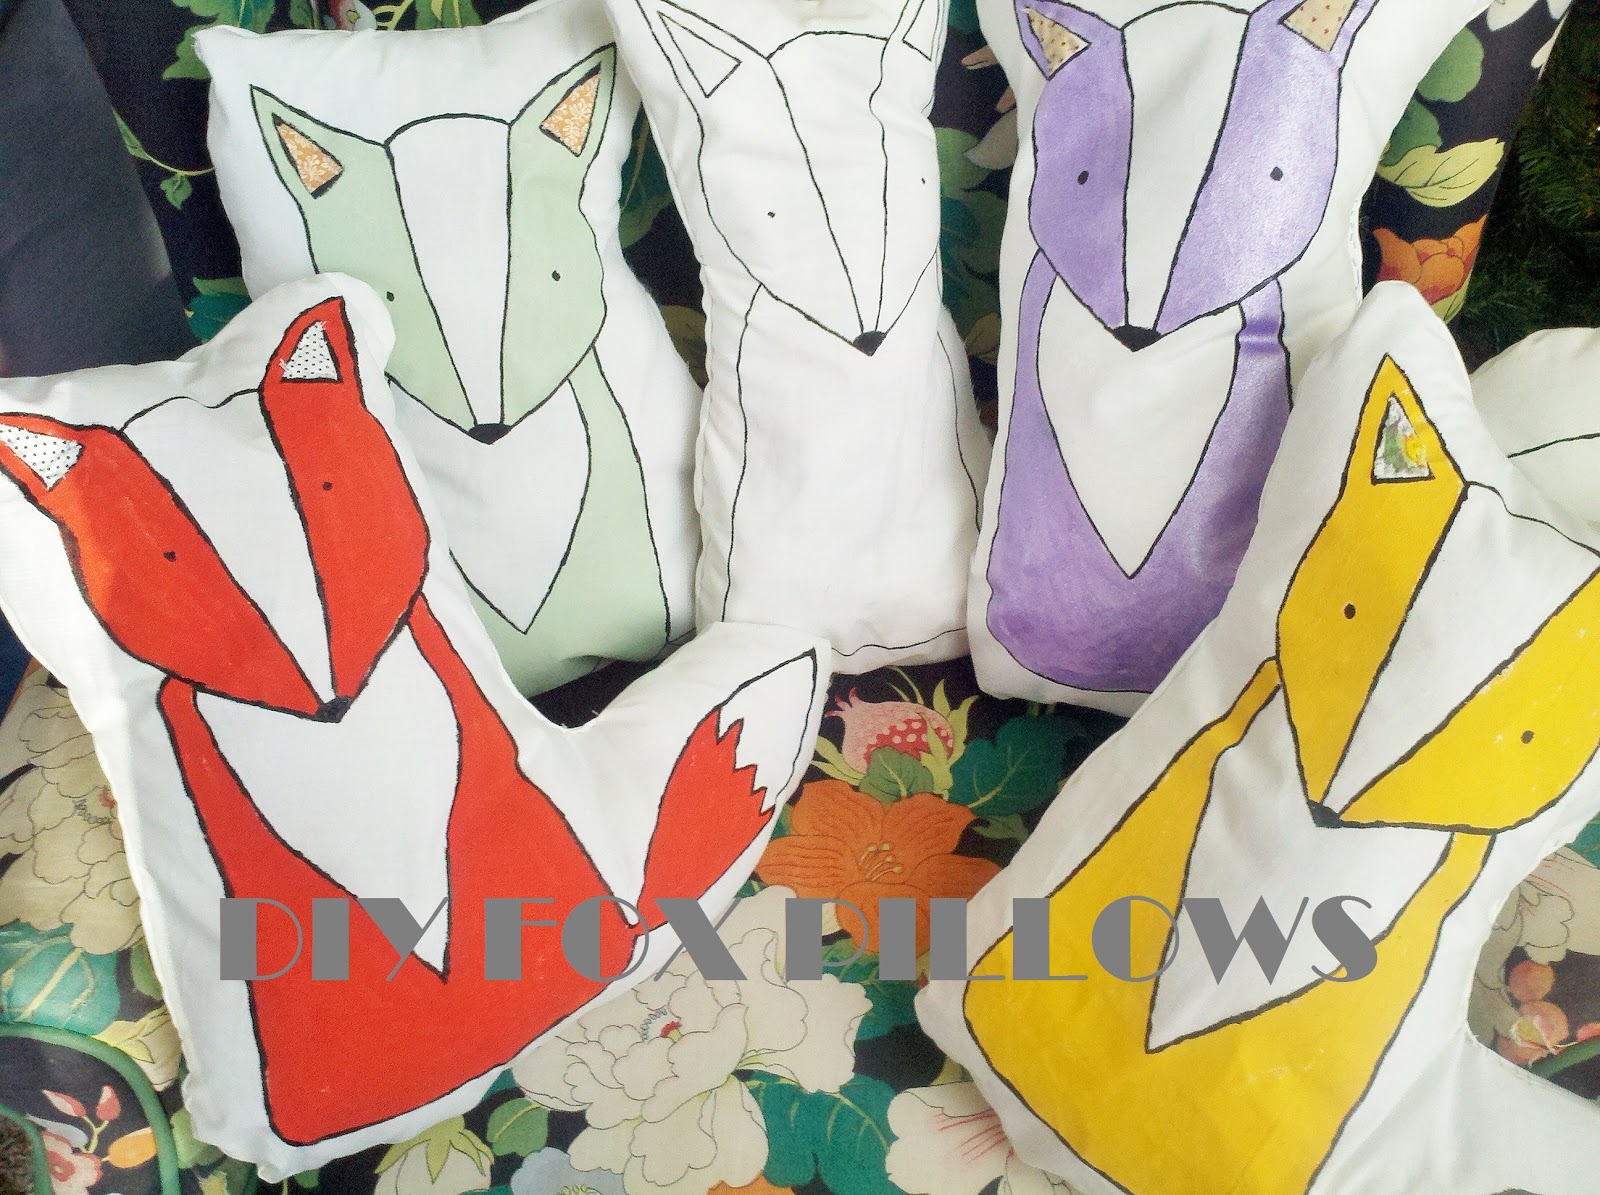
DIY FOX PILLOW


Foxes are all the rage right now. And I am quite alright with that! This makes a great DIY christmas gift if you have still been procrastinating! I don't have a sewing machine so mine were all hand sewn, and one fox took me a bit less than an hour. There are a lot of fox pillow variations right now on Pinterest so this is a mix of several versions I saw around. Here's the low down..

MATERIALS
White fabric ( I used an old white sheet from the thrift store)
Fabric scraps
Fabric paints
Paint Brushes
Sewing needle and thread (or sewing machine)
Cotton (I used Poly-Fil from hobby lobby)

DIRECTIONS

1. Use a pencil to draw your design on the white fabric! I free-handed mine for the first fox, then painted all the lines in black paint. I placed this underneath white fabric to use it as a stencil to trace all the other foxes. You can use different shapes for the chest/belly or for the tail. 

 2. Cut out the drawing, staying about an 1 1/2 inches away from it so there is extra fabric to sew.

3. Paint the base color of your fox. It is okay if your lines aren't perfect because you will then use a fine tip paint brush to paint the black border. You can go thick or thin here.

4. Once dry, place a sheet of white paper over the ears and trace the inner ear triangle. Cut out the paper triangle and use it as a template to cut out a piece of fabric scrap that looks good with your paint choice. Sew these to the ears.


 5. Go back to your white fabric and place your fox up-side down onto a new piece of fabric. Cut along the outline, creating a piece of fabric that is a mirror image. This will be the back of the pillow.

 6. Take a picture of  your attention-hog dog sitting on your fox. This step is CRUCIAL.

7. Place the two cut outs on top of each other ( still with the fox facing down) and get to sewing! Leave a few inches un-sewn for a place to put the stuffing in.

8. Turn inside out, and fill with stuffing! Hand sew up the remaining area and you're done! Easyyy.
-Jerica-


Sunday, December 16, 2012

DIY PICTURE FRAME JEWELRY HOLDER


I have seen a few variations of these jewelry displays on Pinterest and decided to give it a go. I love jewelry and accessories but always seem to lose them. Probably because my idea of storing them is tossing them in a little pile on my desk, floor, purse.. basically anywhere. As you can assume this results in me losing or breaking everything. So this project is right up my ally- something I could use to help organize my jewelry. Now this was not all for me- this was actually a project I did for work. I created these displays ( the big one is for me) for displaying the beautiful and really cool jewelry from my work for our retailers. You can read my other blog here.

Materials:

¼ inch square Wire Mesh Screen
Wire Cutter
Pliers
Scissors
Saw Tooth Hangers
Vintage Frames
Twine
Scissors 

I did two variations of this jewelry display frame- one with a mesh back and another with twine. All you do is remove the glass and backing from the frame, and staple the material you want and how you want it to the back of the frame. Use your staple gun to secure it on. Cut off excess material. DONE!

So simple. I am a big fan of quick and easy projects. Especially ones that do not require too much clean up. If you're interested in more jewelry holders, check out the animal jewelry holder we made here!

For this Vintage Frame DIY Jewelry Display photo shoot I got to raid our inventory and pick some of my favorite pieces to photograph! You can check out more of the jewelry pictured below at www.Nina-Nguyen.com.

Top Left: Seafoam Stalactite Necklace
Bottom Left: Petal Amethyst Druzy Necklace, Bella Geode Earrings, Bella Ammonite Earrings
Bottom Right: Bella Ammonite Earrings  

Thursday, November 29, 2012

DIY: ANIMAL JEWELRY HOLDER


How awesome is this?! This is an inexpensive DIY alternative to the $65 version found here.
That one is still super cute but there's no way I could pay that much! All together this project cost me probably $12 in new material. Not too baaad. I had been watching at the thrift store for a bag of plastic toys but finally gave up and went to Hobby Lobby for some. This was probably the most expensive part at 8 dollars. The wood plaque was half price at 4 dollars.

MATERIALS
Plastic Animals
Wire cutters
Gold Spray Paint
Mod Podge
Gloss spray paint
Hot Glue

DIRECTIONS
1. You may paint the plaque if you want, but I chose to leave mine plain. If you do paint it, let it dry thoroughly then paint mod podge over the entire thing and let that dry. Finish off with gloss spray paint. If you choose not to paint it, simply use mod podge then the gloss spray.

2. Cut the animals. This is the hardest part. I found some very sturdy wire cutters in my house that ended up working great, but use whatever you can use to get these guys cut!

3. Use gold metallic spray paint (got mine from wal-mart) to spray the animals and let dry. You can use any color here, or omit this step entirely. Originally I had left them unpainted but thought it looked kind of kiddy.The gold paint looks soooo adult and sophisticated :)

4. Place a dab of hot glue on the back and press hard until glue cools. I wasn't sure how well this would hold up initially, but it has done just fine. Just don't hang super heavy jewelry on and you should be good!

-Jerica-

Thursday, September 27, 2012

DIY: PORCELAIN PEN ON MUGS

Here is a project that is all around Pinterest that we did with our friends Alix and Katherine. It is so simple, all you need are porcelain or ceramic mugs (ours were all from the thrift store) and some porcelain pens for a new mug set! This could be a fun DIY gift to make for someone, pair it up with some hot chocolate mix or this homemade chai tea mix and you're good to go! The porcelain pens I picked up were from Micheal's because Hobby Lobby didn't seem to have any, however I couldn't find the ones that you can bake in the oven to set the drawing. So make sure you handwash these babies only and be very gentle when washing the drawing because it may come off, as you would expect! Also the paint can come off if the drink is extremely hot, so I would recommend not drawing on the inside of the mug unless you use the ones that can be baked, so that you don't die! You can find the designs that Amy and I used for our trees here. 

My mugs:

I found the mug with the little brass knuckles from the thrift store, its my favorite! I chose all white mugs so it would still look like a cohesive set even though they are all different styles.

Amy's mugs:


Katherine's mugs:


See what you can come up with!
-Jerica-

Sunday, September 9, 2012

DIY WALL PLAQUES


On a random shopping spree at Walmart I came across this awesomeness! A two in one burning tool for wood or stenciling. Check it out here: you will LOVE it. It has become my new favorite crafting tool! I had some extra wood plaques that was left over from my picture transferring onto wood project, I decided to put them to use and see what happens.

During a moment lapses of creativity (and as a practice piece) I decided to use the blog title and play with a font I found on Jerica’s Pinterest and one of my logo ideas. I did some accents with some acrylic paint and voila! On another plaque I decided to burn lyrics from one of my favorite songs, Pachuca Sunrise by Minus the Bear. The lyrics are “This is a city for not sleeping and the clocks are set by feel, at this moment from where I sit none of it seems real”. ooooo so deep and meaningful haha. But really it is one of my favorite songs.

The only thing with using this tool is that its hard to get the fonts exactly how you want them especially when they have curves in them. It could possibly be because of the head I used but the other additional heads that came with the kit did not heat up as hot. I am definitely one that likes instant gratification so I didn't want to wait around redoing each letter to get the dark scorch marks on each of the letters. The tip I used was the angled tip.

Since the plaques were a light color and looked unfinished I tried a stain that has been all over Pinterest! Are you seeing a theme here? Pinterest Pinterest Pinterest. I soaked some old nails and steel wool in apple cider and absamic vinegar to get a gray wood stain. I had to let the mixture sit for almost 24 hours before the color actually started to become apparent. So hard for me to wait that long but I did it! Add a coat or 2 for a darker shade.
-Amy-