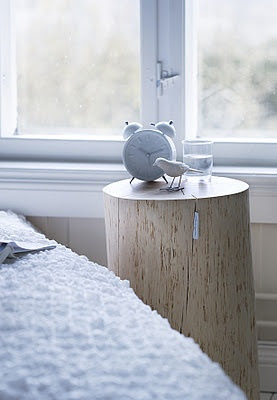
This is probably the first DIY that I will not say is super easy and quick! I've been working on these guys since November I believe, slowly picking away at the bark each day with a screw driver and hammer. This was the definitely the longest part, but I've heard if the bark is dry enough it will slide right off. Mine did not!
I got the stumps from my aunt's pile of firewood, but I know other people have gotten them from wood yards for super cheap. Just gotta watch out for termites and spiders! Some people suggest placing the stump in plastic trash bag and then leaving it somewhere like a garage for a few months. This will allow the bark to dry out and will prevent new bugs from getting in and old bugs from spreading around your garage.
I got the stumps from my aunt's pile of firewood, but I know other people have gotten them from wood yards for super cheap. Just gotta watch out for termites and spiders! Some people suggest placing the stump in plastic trash bag and then leaving it somewhere like a garage for a few months. This will allow the bark to dry out and will prevent new bugs from getting in and old bugs from spreading around your garage.
I made these shorter because I will put them next to my bed, which sits about a foot off the ground. (To get a better look the bunting I have up, click here!)
MATERIALS
Tree stump(s)
Flathead screwdriver
Hammer
White paint
Sandpaper
Polyeurthane
DIRECTIONS
1. Use a hammer and flat-head screw driver to pry off the bark. Be careful not to jam the screwdriver into the side of the wood, but just skim the surface. There were a few spots that still had large branches, I broke those off then used the hammer to flatten it out.
2. Sand away! Get as much of the left over bark off as you can.
3. I painted the top of the stump white. You can do whatever you want! This blog has tons of different ideas for how to paint your stump. Use several layers.
4. After the paint is dry, make sure all the dust is off. I used a clean paint brush to get the sawdust off.
5. Paint on the polyeurthane. Let this dry a few hours between layers. This will help seal and prevent anything from staining the wood. The brand recommends using three layers, but you can use more if you want a glossier look. HOORAY NEW TABLES!


